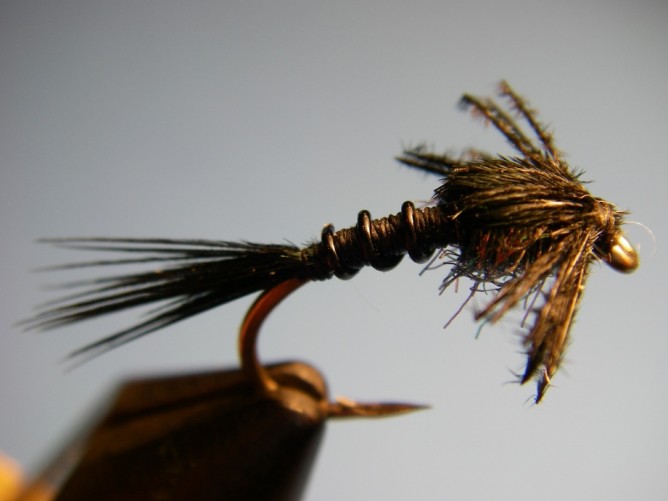
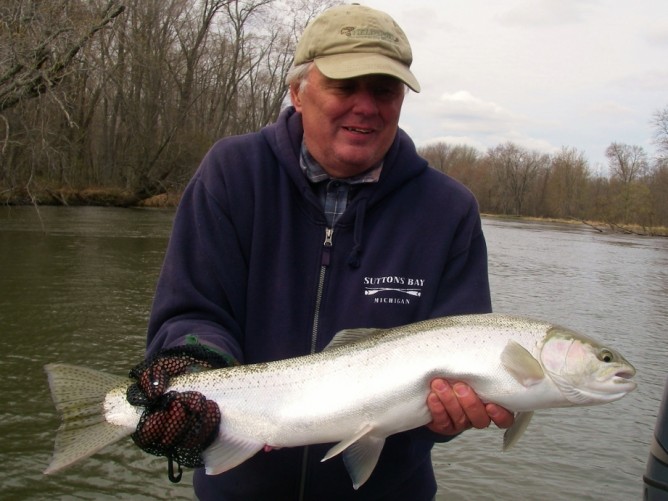
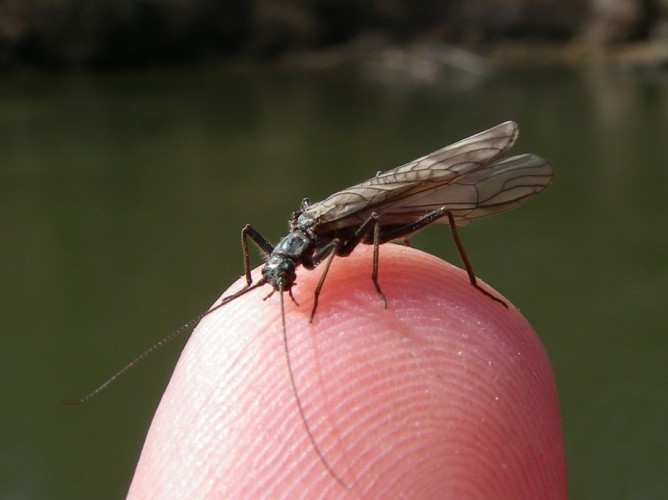
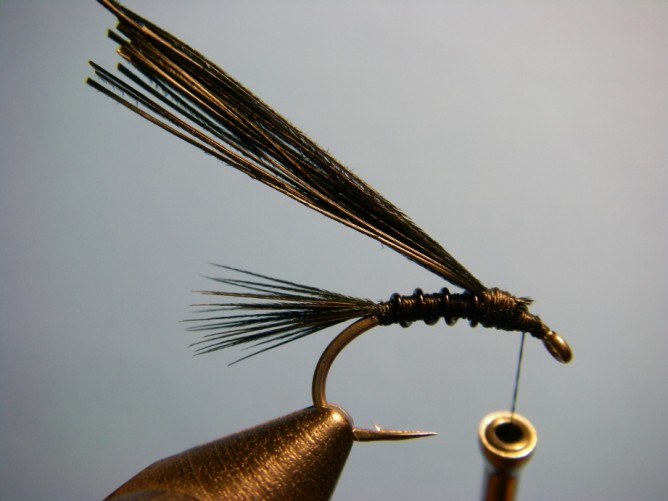
Small black stoneflies are one of the first aquatic insects to hatch in significant densities making them an ideal fly choice for those fishing steelhead in late winter and early spring. This quick and easy to tie stonefly nymph pattern helps you load up a row in your fly box quickly, allowing for more time on the water.
Stoneflies crawl around on the bottom and often become active with a slight increase in temperature – most notably when the sun is out warming the water a degree or two. The adults flutter on the water but the nymphs crawl to the bank to emerge. Look for them on any streamside snow, and if you see this happening- tie on a small black stone.
Fish it dead drift like any nymph- preferably in tandem with a larger fly – often an egg pattern to serve as an attractor. Trout anglers have also found this nymph successful in the early season when the bugs are active.
Borrowing from the pheasant tail nymph, this pattern was designed to be impressionistic and quick to tie. This fly’s simplicity is what makes it a favorite to fish. Who doesn’t like an effective fly that is quick to tie?
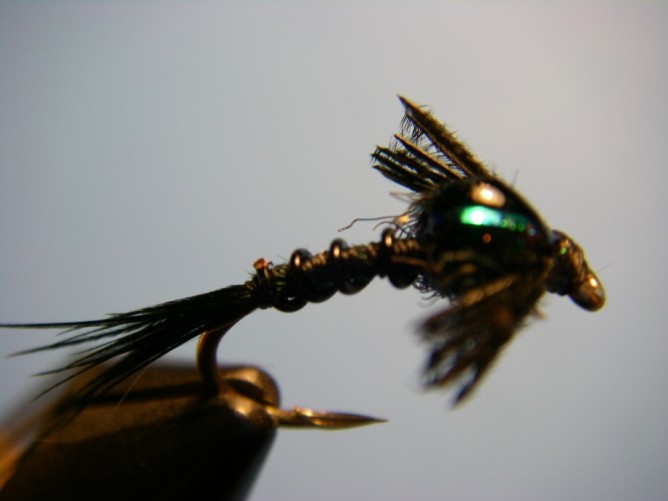
Optional Epoxy Head
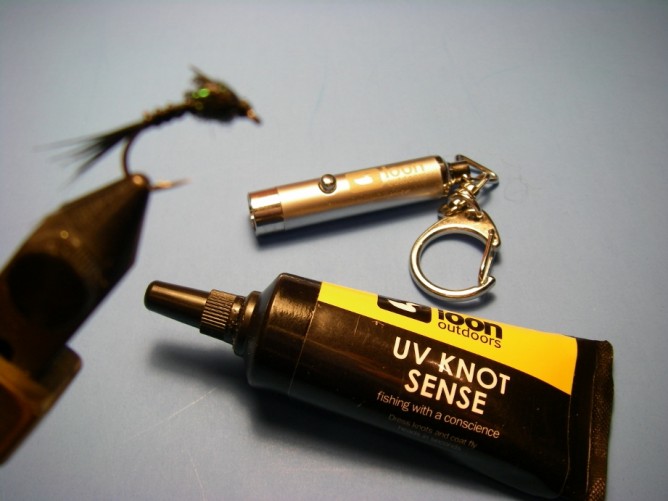
Tie a few of these Early Black Stones with the sparkling epoxy covered wingcase borrowed from the Copper John fly pattern adding a nice element to it. This sparkle often provides just enough “trigger” to get fish to bite. Even though these flies get active as early as February and continue through April, this pattern, especially with the epoxy head, can come up big in the fall.
Ted’s Early Black Stone is available from Rainy’s Flies and can be bought in stocking fly shops. Below are tying instructions for you fly tiers.
Early Black Stonefly Recipe
Hook: TMC 2457 #8-12 or Daiichi X120
Thread: Uni 6/0 Black
Tail: Peasant Tail – Black
Body: Thread
Rib: Black Wire – Large
Thorax: Ice Dub – Peacock
Wingcase: Pheasant Tail – Black
Legs: Pheasant Tail – Black
Tying Instructions
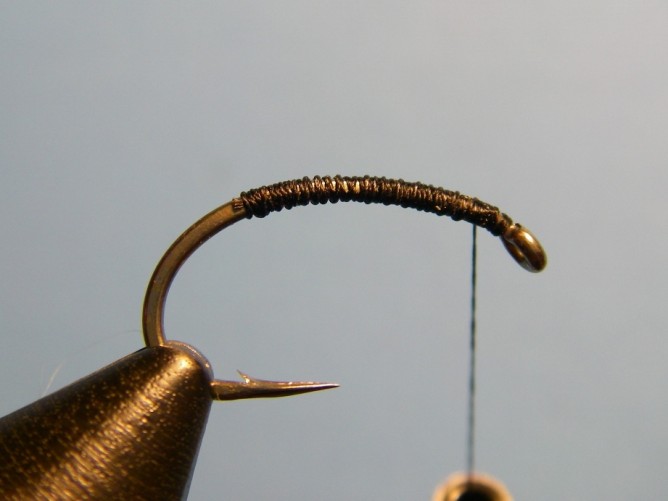
Step 1. Place hook in the vise and wrap a base layer of
thread to above hook barb and then back to toward the eye.
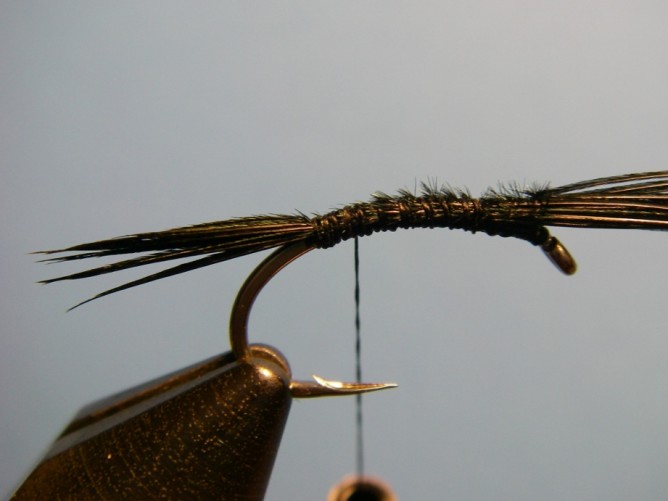
Step 2. Select 8-10 strands of pheasant tail dyed black and tie in on top of the hook so the
natural tips of the tail extend about a hook gape’s distance beyond the barb/base layer.
Now wrap thread back towards hook eye and over the shank which becomes the body.
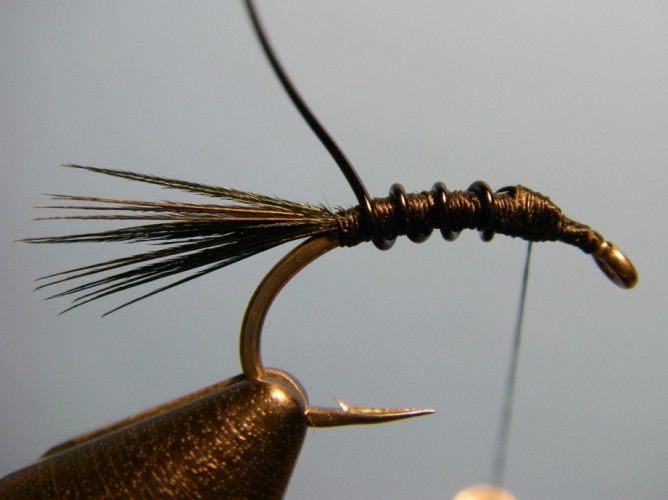
Step 3. Tie in the wire on top of the hook at the thorax area. With your fingernail against the wire to keep
the wire from spinning at the tie-in area, wind the wire back towards the tail. Using wire cutters, trim the wire.
Step 4. Tie in another clump of pheasant tail (or the remainder of the original material) to serve as the wingcase.
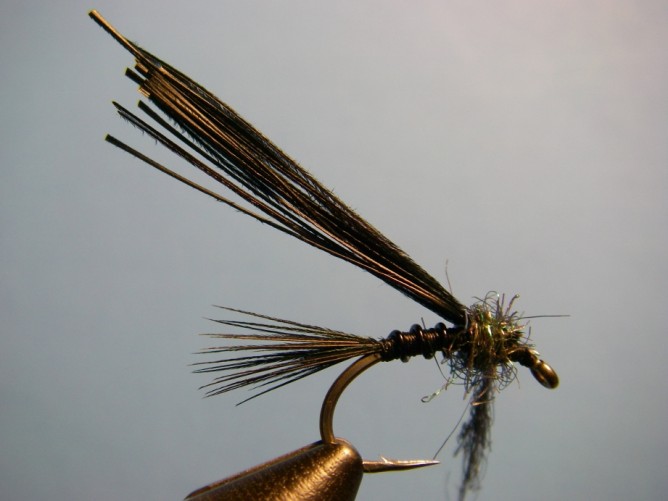
Step 5. Dub a robust thorax with Ice Dub.
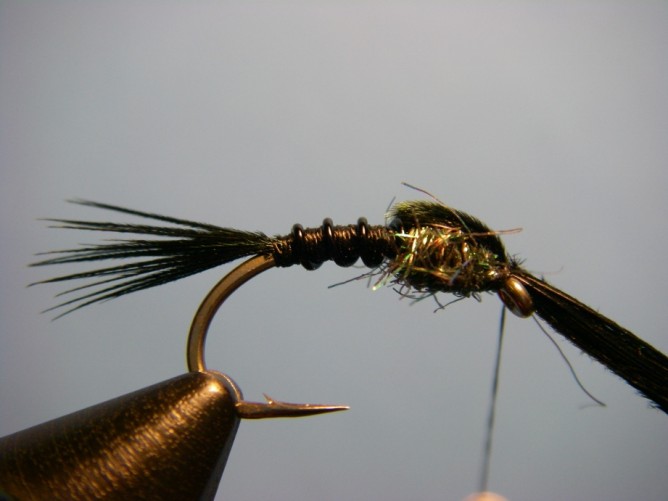
Step 6. Pull the pheasant tail fibers over the thorax as the wingcase
and tie down with two or three wraps – DO NOT TRIM excess material.
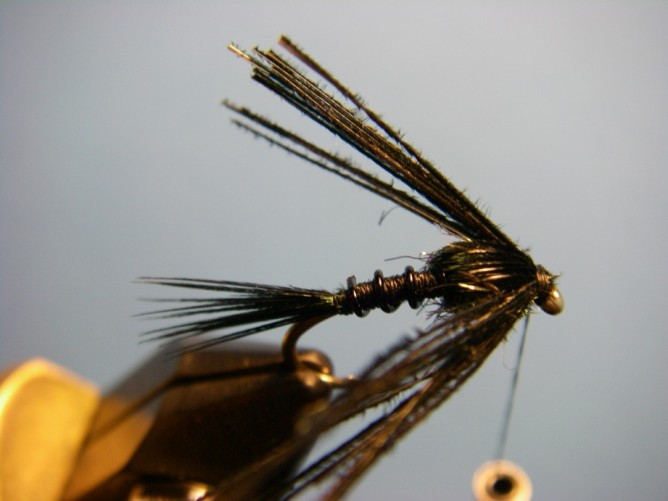
Step 7. Divide the pheasant tail fibers to each side of the hook and wrap them
so they are positioned about 45 degrees angled backwards.
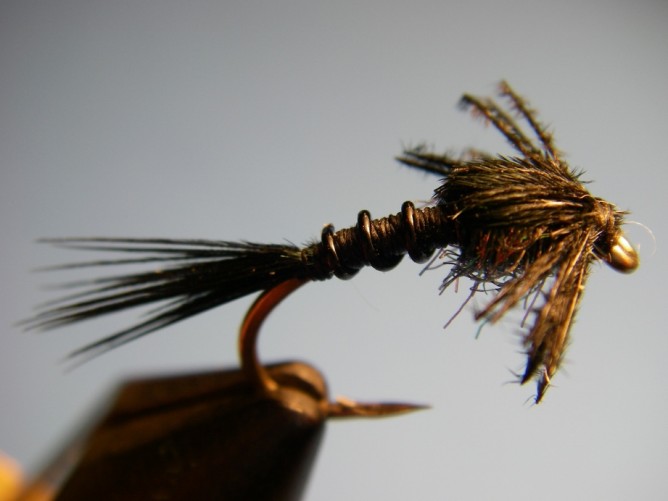
Step 8. Trim the fibers, which are now the legs, so they are slightly longer than the thorax. Whip Finish and
apply water based head cement over the thread body and head. Standard head cements will melt Ice Dub.
Optional Epoxy Head:
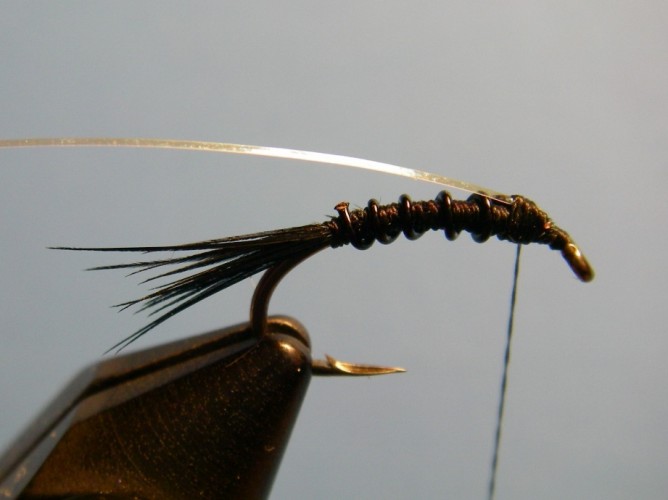
Step – 3 1/2. Between Steps 3 and 4, tie in a piece of flashabou.
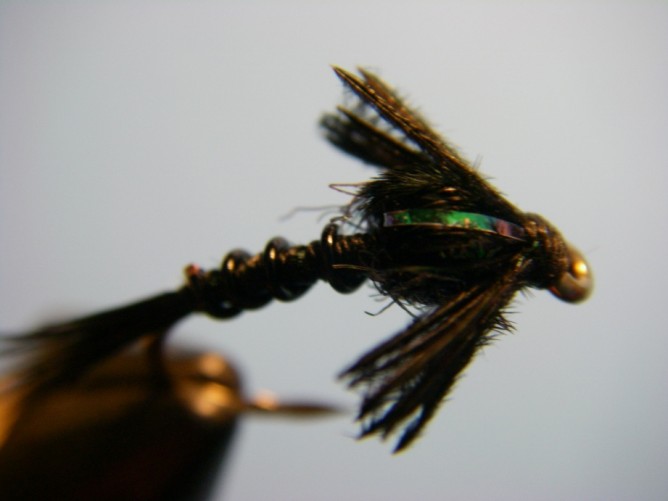
Step – 7 1/2. Pull the flashabou over the wingcase, centered and tie off.
Step – 9. Apply a drop of Loon UV Knot Sense over the thorax and cure with UV light. You can
use 5-minute epoxy or Clear Cure Goo as an alternative to Knot Sense to achieve the same effect.

