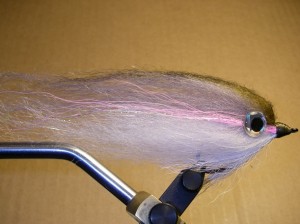
Fin Clip – Imitates Stocked Rainbow Trout and Steelhead
Each year DNR fish stocking trucks back up to the river to subsidize fish populations on many of our rivers. The beeping noise these trucks make when in reverse is like a dinner bell to the larger fish in the river – they know that the next two months is a perfect time to get a mouthful of easy prey.
The Fin Clip was designed to imitate naïve hatchery rainbow trout put into the wild where the natives take note and eat big. I first started tying this as a small baitfish pattern but it soon became “super-sized” after seeing some large fish eat the stockers. After I tied some for a few fellow guides it didn’t take long to become a favorite of both anglers and fish looking
for something big.
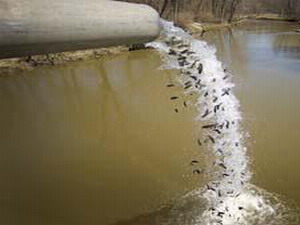
Stocking Hatchery Fish Becomes A Food Source
I like to tie the Fin Clip in a few sizes to replicate the size of the fish stocked in the river. Hatcheries sometimes have various size planters and as anglers, we are always trying to imitate the common food source – it’s no different here – match the naturals.
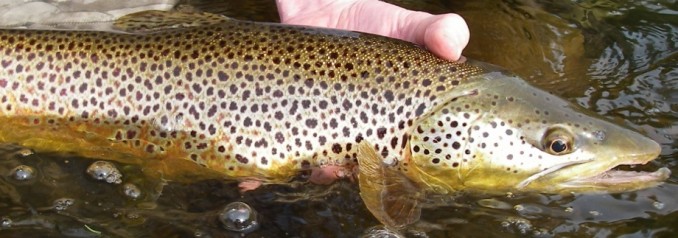
Tie this pattern in other color schemes to imitate chubs, brown trout, suckers and bass for not only trout but other predatory species. While it doesn’t imitate anything in particular, Chartreuse and White makes a great attractor which fish often crush.
The primary material used in the Fin Clip is Icelandic Sheep Hair because of its inherit qualities. First, it moves, slinks and wiggles when the fly is paused between strips and the current has its way with it. Second, it offers neutral buoyancy allowing the fly to suspend in the water column on the pause. Third, Icelandic sheep hair comes in a wide variety of colors. Fourth, when wet, it fills out and maintains a realistic profile. Fifth and lastly, it sheds water with one good false cast making it easier to cast than you might think.
How To Fish the Fin Clip
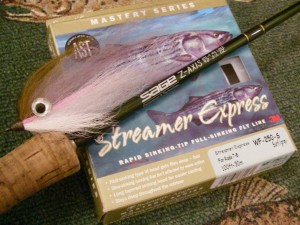
Unlike a lot of streamers used for trophy trout, this fly doesn’t need to be in the “zone” for a fish to eat it. Rather, fish can see this large profile pattern and when fished with long strips and 2 -4 second pauses (depending on the depth of water), it gives the appearance of a disoriented stocked fish that isn’t swimming all that well and creates a perfect predator-prey relationship and gets the fish to move long distances to eat. I cast this fly with 6 and 7 wt. rods and heavy sink-tips like Scientific Anglers 250 grain Streamer Express. This 30’ sinking section of line keeps the fly in the optimum water column throughout the retrieve. Leaders should be short – 5 to 6 feet long and Maxima Ultragreen in 8 and 10 pound-test is preferred.
Not perfect
While effective, the Fin-Clip is not perfect and has some drawbacks to it. While it’s a good thing that the sheep hair sheds water to ease in casting, those that might be around you if fishing from a boat will notice the isolated showers it creates.
Don’t rush – cast slow with a long casting stroke and don’t try to force or punch a cast – it will cause the materials to foul in the hook bend loosing it’s profile and action.
It’s a fly for big aggressive fish which usually key in on the eye (notice the oversized eyes?) and attack at the head. This can create some broken hearts with fish that “nip” at the tail or attack the head and miss the hook. I have tried to incorporate a stinger hook for some of those tentative takes, but haven’t found a method that doesn’t compromise the action of the pattern nor get tangled up with the connection .
This pattern does take a little time to tie, but since it doesn’t sink like a rock, it doesn’t hang up too much on the bottom. When it does, it is easy to see and often get back without donating.
The Fin Clip is predominately used for those fish that are not only big and eat big too– it’s a pattern that is meant for the alpha-fish that have given up on snacking and prefer to eat large meals with one bite.
Fin Clip Recipe
Hook: Gamakatsu B10S, SZ 1/0 or 2
Thread: Uni 6/0 – Olive Dun
Tail: White Bucktail
Body: Icelandic Sheep Hair/Streamer Hair – White, Shad Gray, Silver Gray & Olive Brown Pink Bucktail
Throat: Calf Tail
Flash: Shrimp Pink Krystal Flash and a subtle flash like Wing ‘N Flash or Angel Hair and Shrimp
Eyes: SZ. 1/0: 3/8”, SZ. 2 : 1/4” 3-D Molded
Other: Flex Seal, Black Indelible Marker, Super Fabric Textile Adhesive, Sally Hansen Clear Nail Polish
Tying Instructions
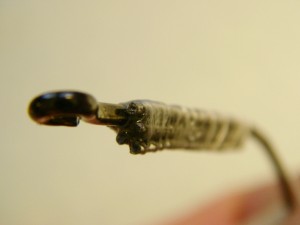
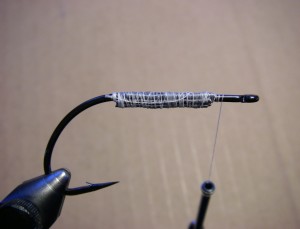
Step 1. Cut lead wire to build a keel – .035 for sz. 1/0, .025 for sz. 2. Wrap one
piece of lead at a time along each side of the shank and downward making an
upside-down triangle until you have all 5 pieces securely wrapped. Then apply
a few drops of Zap-a-Gap. The feel keeps the fly tracking relatively straight and right side up.
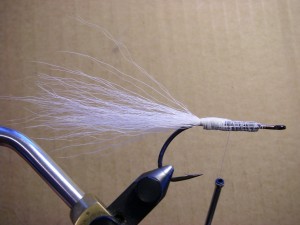 Step 2. Tie in a clump of Bucktail that will extend almost as long as the
body material – Aprox. 3 times the shank’s length. This under tail helps
maintain the ideal profile and discourages the material fouling in the hook bend.
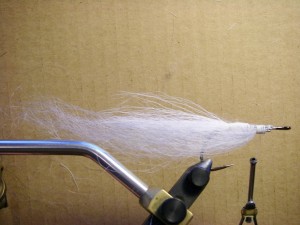 Step 3. Tie in the bottom body hair – this is Shad Gray from Wapsi. Start with
a good clump and remove some of the under fur. Also, pull out any of the long
hairs. Tie in above the hook point leaving a little bit of the ends and then wrap
up into the hairs to get a good purchase on the materials. Take note of the hair length.
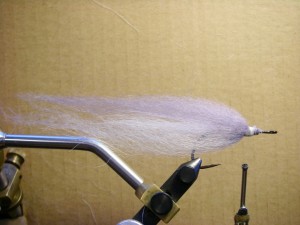 Step 4. Tie in Silver Gray (Hareline) Sheep Hair on the top
of the hook using the same techniques as in step 3.
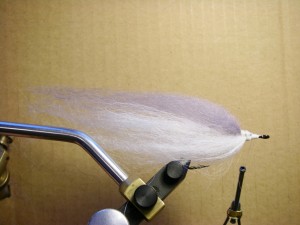 Step 5. Tie in the second section of Sheep Hair on the underside – white.
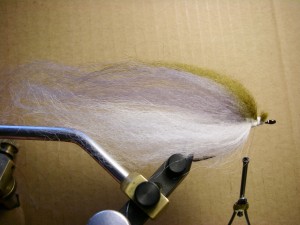 Step 6. Tie in the second Section of Sheep Hair on top of the hook – a mix of Silver Gray and Olive Brown.
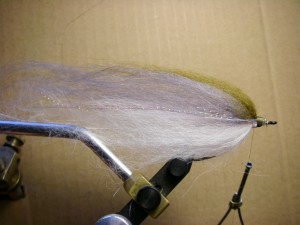 Step 7. Tie in a strand or two of Krystal Flash and some subtle flash material like Angel Hair
to add just a hint of sparkle – Most stocked fish are pale for the first few months after being planted.
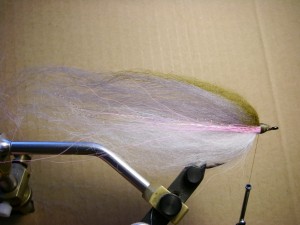 Step 8. Tie in a small section of pink deer hair on each side. Not only does this give
the Fin Clip a light pink hue, but also helps keep the sheep hair in place when fished.
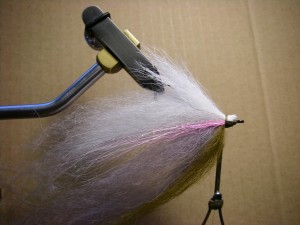 Step 9. Tie in a clump of White Calf Tail for a throat. The tips should extend downward
just beyond the hook point and helps prevent the body material from fouling.
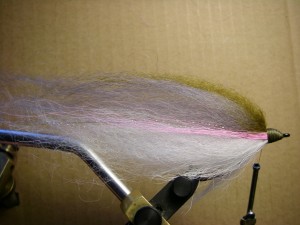 Step 10. Build a large head of thread to behind the hook eye and whip finish a few times to secure.
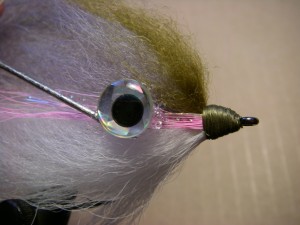 Step 11. Apply Super Fabric Textile Adhesive with a bodkin just above center on the material and
half way back between the hook point and hook eye. This should also cover the flash and pink bucktail.
Apply eye so that it assists in building up a heavier front profile rather than a long, streamlined shape.
Use more adhesive than you might think to acheive this “upward bulk” appearance. Thie eye and adhesive helps
keep the various materials in place in addition to reinforcing them. Repeat on other side. Allow adhesive to dry.
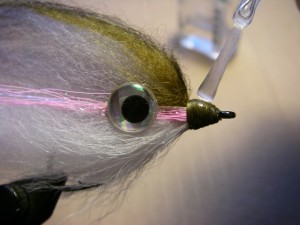 Step 12. With the hook in the vise, apply a light coat of nail polish and then dry on a drying wheel. If you don’t
have one, set the hook point so the fly is vertical and apply very light coats. Make sure the head is completely
cured before applying a second coat. Once dry, take a marker and lightly darken the very top of the sheep hair.
In the past I have made vertical parr marks on the side of the fly with a black Sharpie marker.
Tying Notes
To speed up the process, I like to sit down and keel a number of hooks at one time and then come back to them after the Zappa Gap has dried before the next step. This is also true with applying Flex Seal to the bucktail tail, applying the eyes and finishing the head. Super Fabric Textile Adhesive is the only product I have used that keeps the eyes attached to flies – it has some flexibility which keeps it from sheering off.
